How to set up conversions in Google Ads with Google Tag Manager
A simple and quick manual for setting up conversions.
What is conversion tracking?
Actions that are valuable for your business are called conversions.
A conversion can be, for example:
- a newsletter sign-up
- an app download
- an abandoned cart
- a product purchase
- and so on
Conversion tracking helps you measure the conversions you have defined and attribute them to particular sources. That way you can find out whether a conversion came from a digital ad campaign, from a social media post or from a direct visit to your website.
Google Tag Manager — what is it?
To set up tracking tools or to capture conversions you often have to integrate so-called code snippets. Editing the source code for this purpose is time-consuming and error-prone. That is why Google Tag Manager exists.
With Google Tag Manager you can integrate third-party code snippets without editing the source code. You only have to integrate the Google Tag Manager code once. Everything else can be managed in your Google Tag Manager account.
Setting up the account and the container
On the Google Tag Manager website you can start creating an account.
Besides the name and the country, you create your first so-called container here. You can create one container for each website or mobile app.
A code snippet is created for every container. That is the snippet mentioned above, the one you have to install once. After that you can manage all the other snippets as so-called tags directly in Google Tag Manager.
Tags
A tag is a third-party code snippet that you want to apply to certain actions on your website or mobile app.
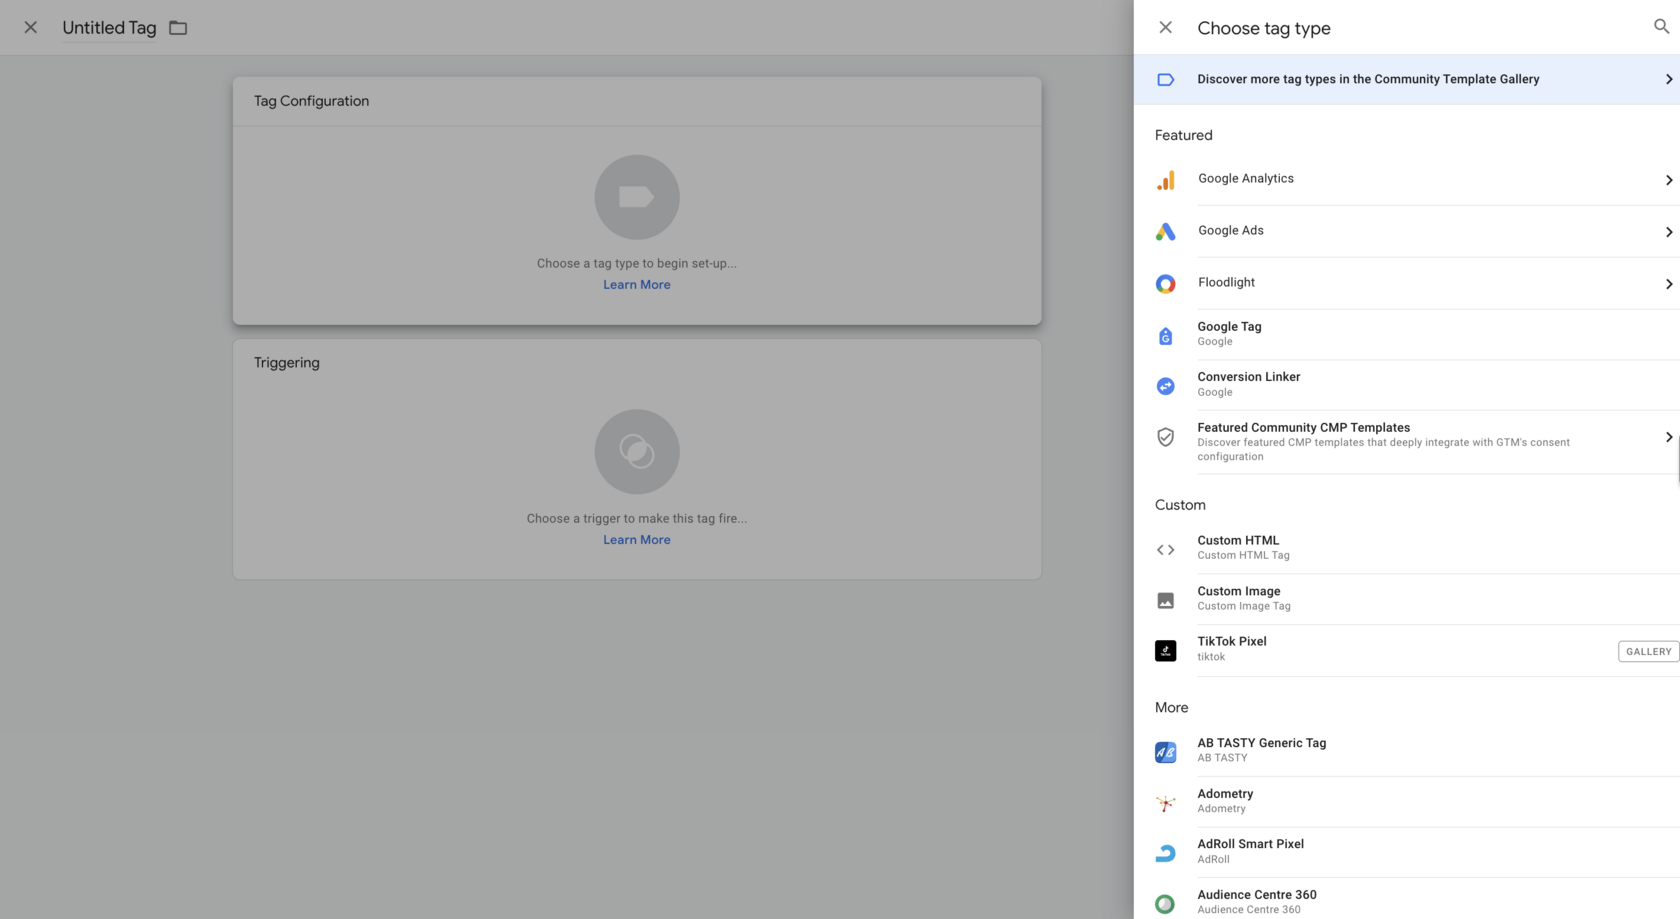
When you create a tag in Google Tag Manager you have to choose the tag type. A wide range of predefined tag types is available, which you can use straight away with the matching configuration. For individual tags you can choose the “Custom HTML” or “Custom Image” type.
Triggers
With triggers you can define in Google Tag Manager when a tag should fire. When creating tags you have to select one or more triggers.
The “All Pages” trigger is available as the default option to fire the tag on every page of your website or mobile app.
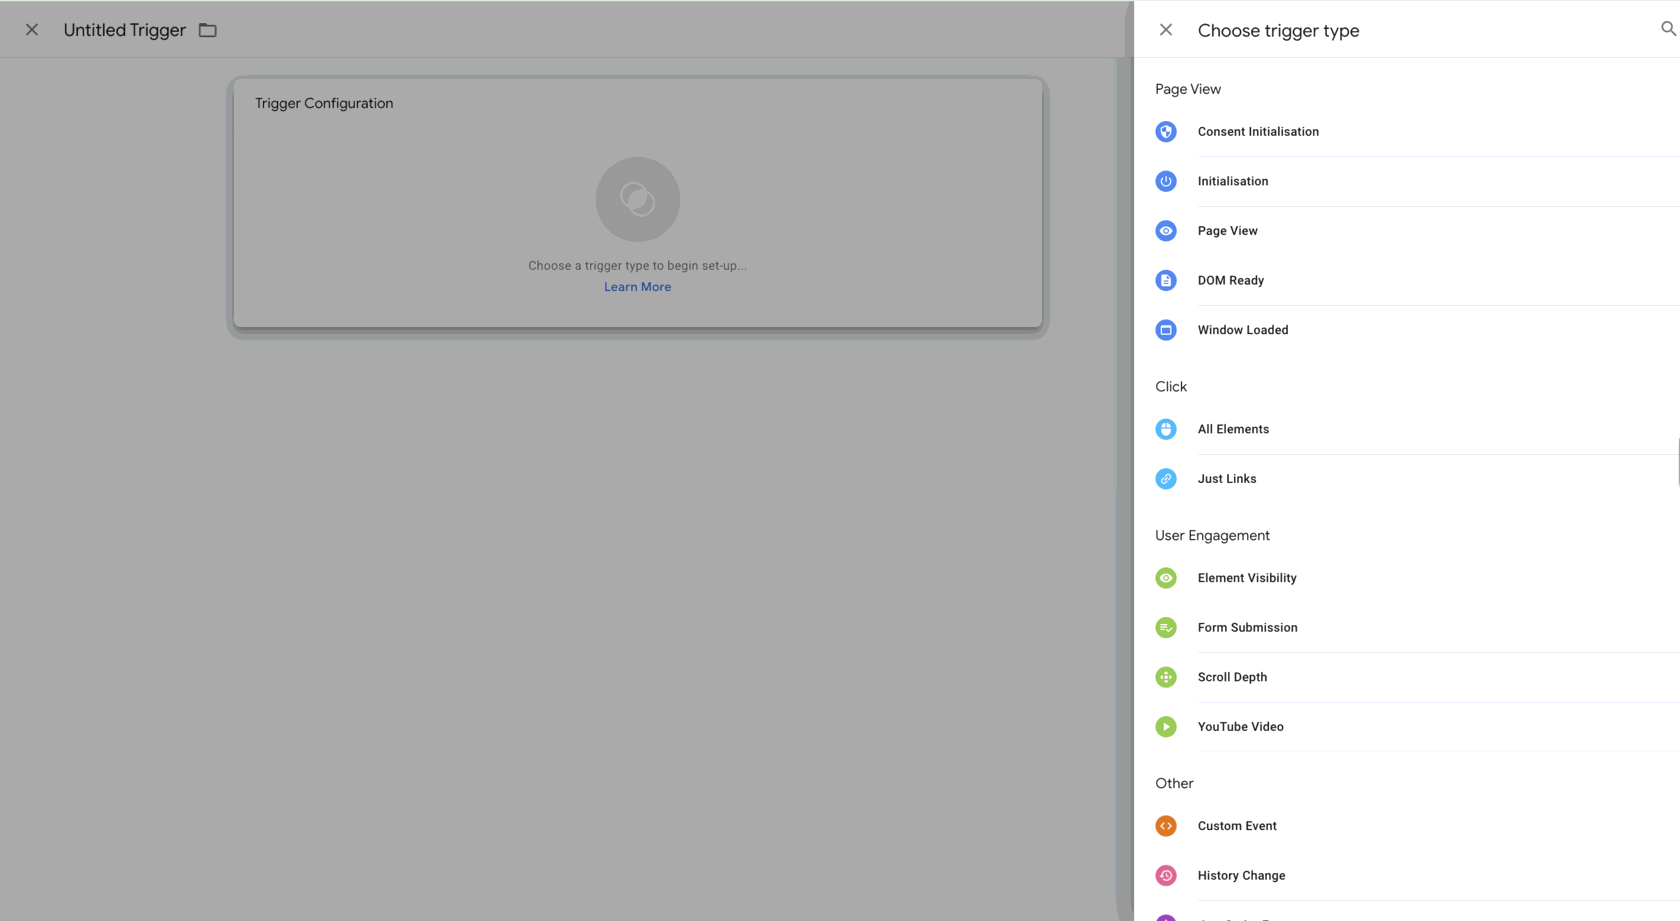
To create your own triggers you have to choose the trigger type. Just as with tags, various predefined types are available. For example, you can use the “page view” type to define triggers for which page views should fire the saved tags.
Measuring conversions in Google Ads
To create a conversion in Google Ads and measure it with Google Tag Manager you need:
A link with Google conversions
Before you can measure a Google conversion event you have to integrate the so-called “Global site code” on every page of your website. With Google Tag Manager this is very easy — by creating a so-called “conversion link”. Do it like this:
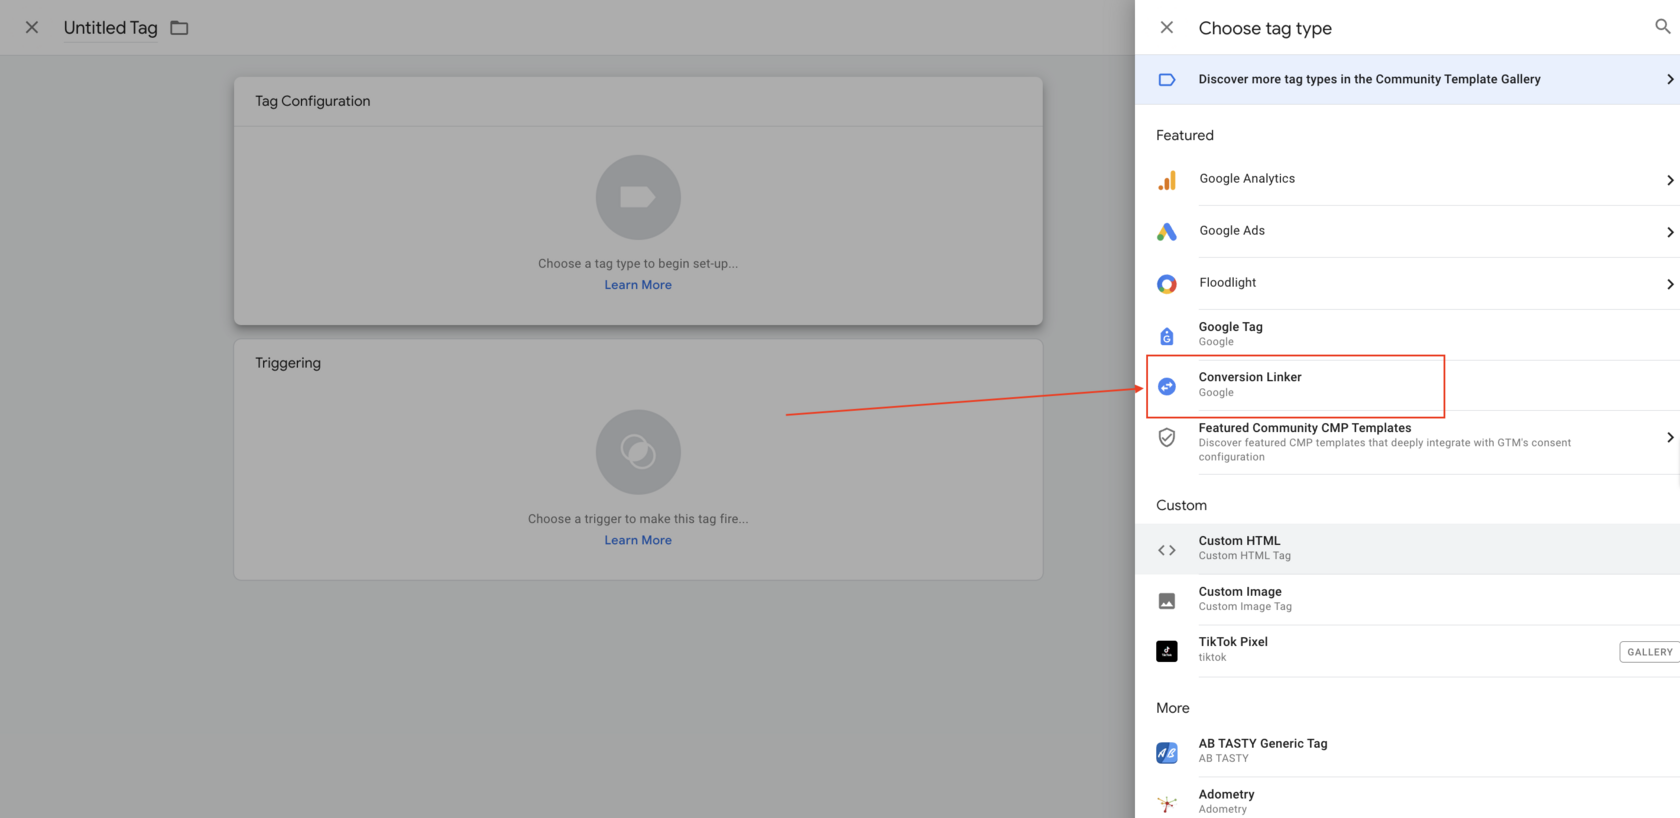
Create a tag of the “Google Conversion Link” type in Google Tag Manager. This tag template does not require any further configuration.
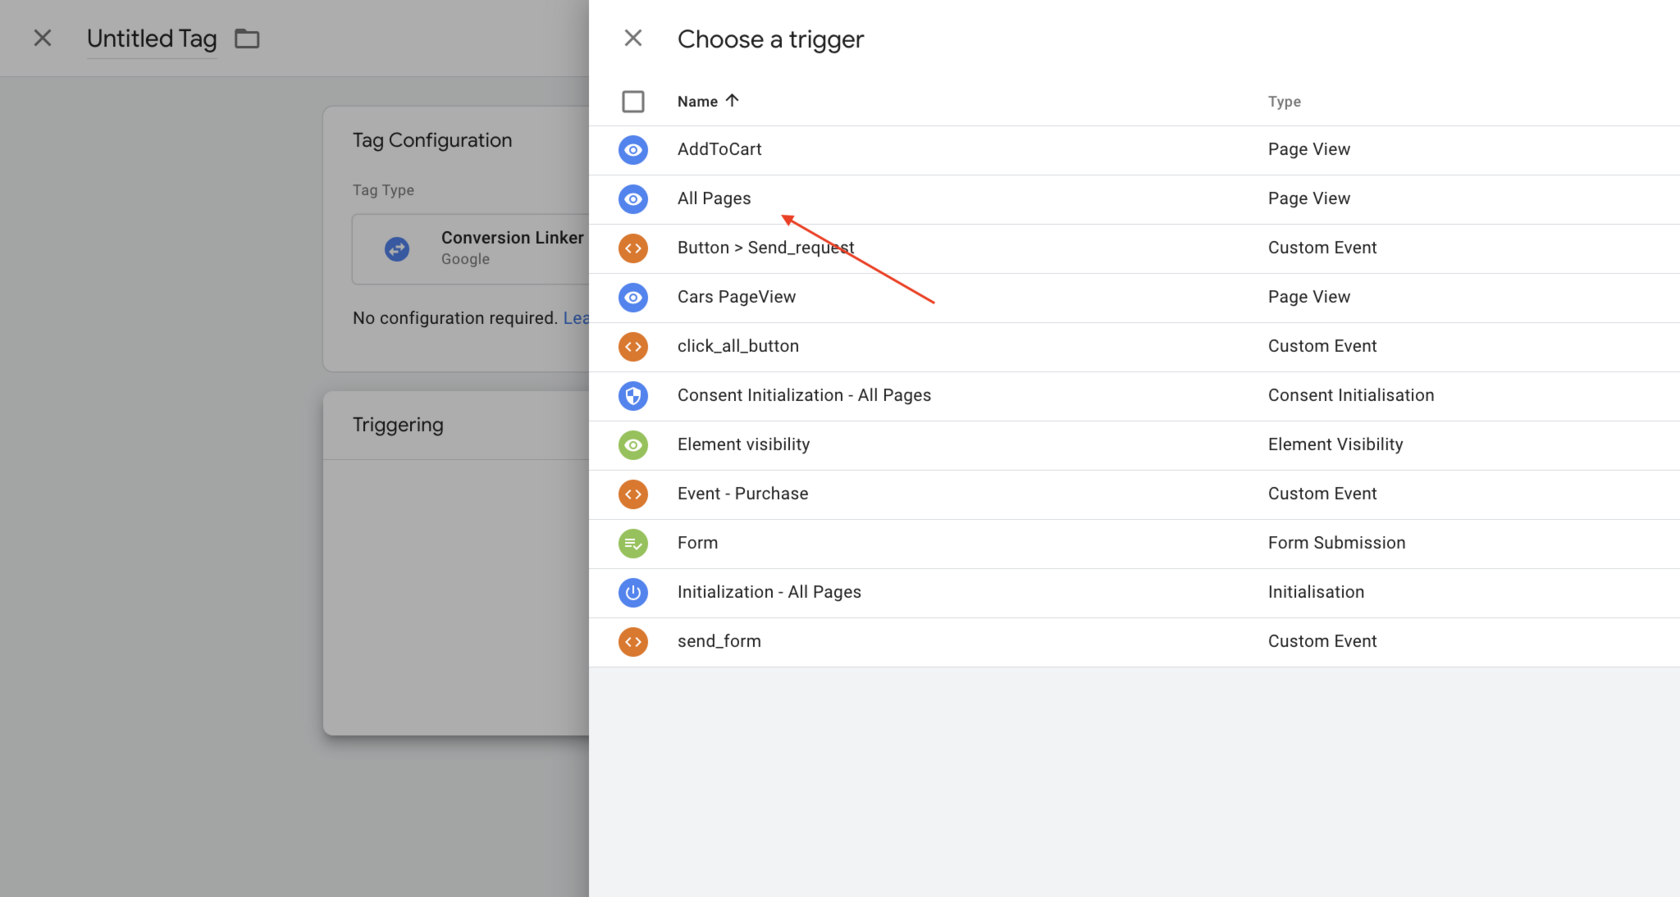
Select the existing “All Pages” trigger so that the tag fires on every page.
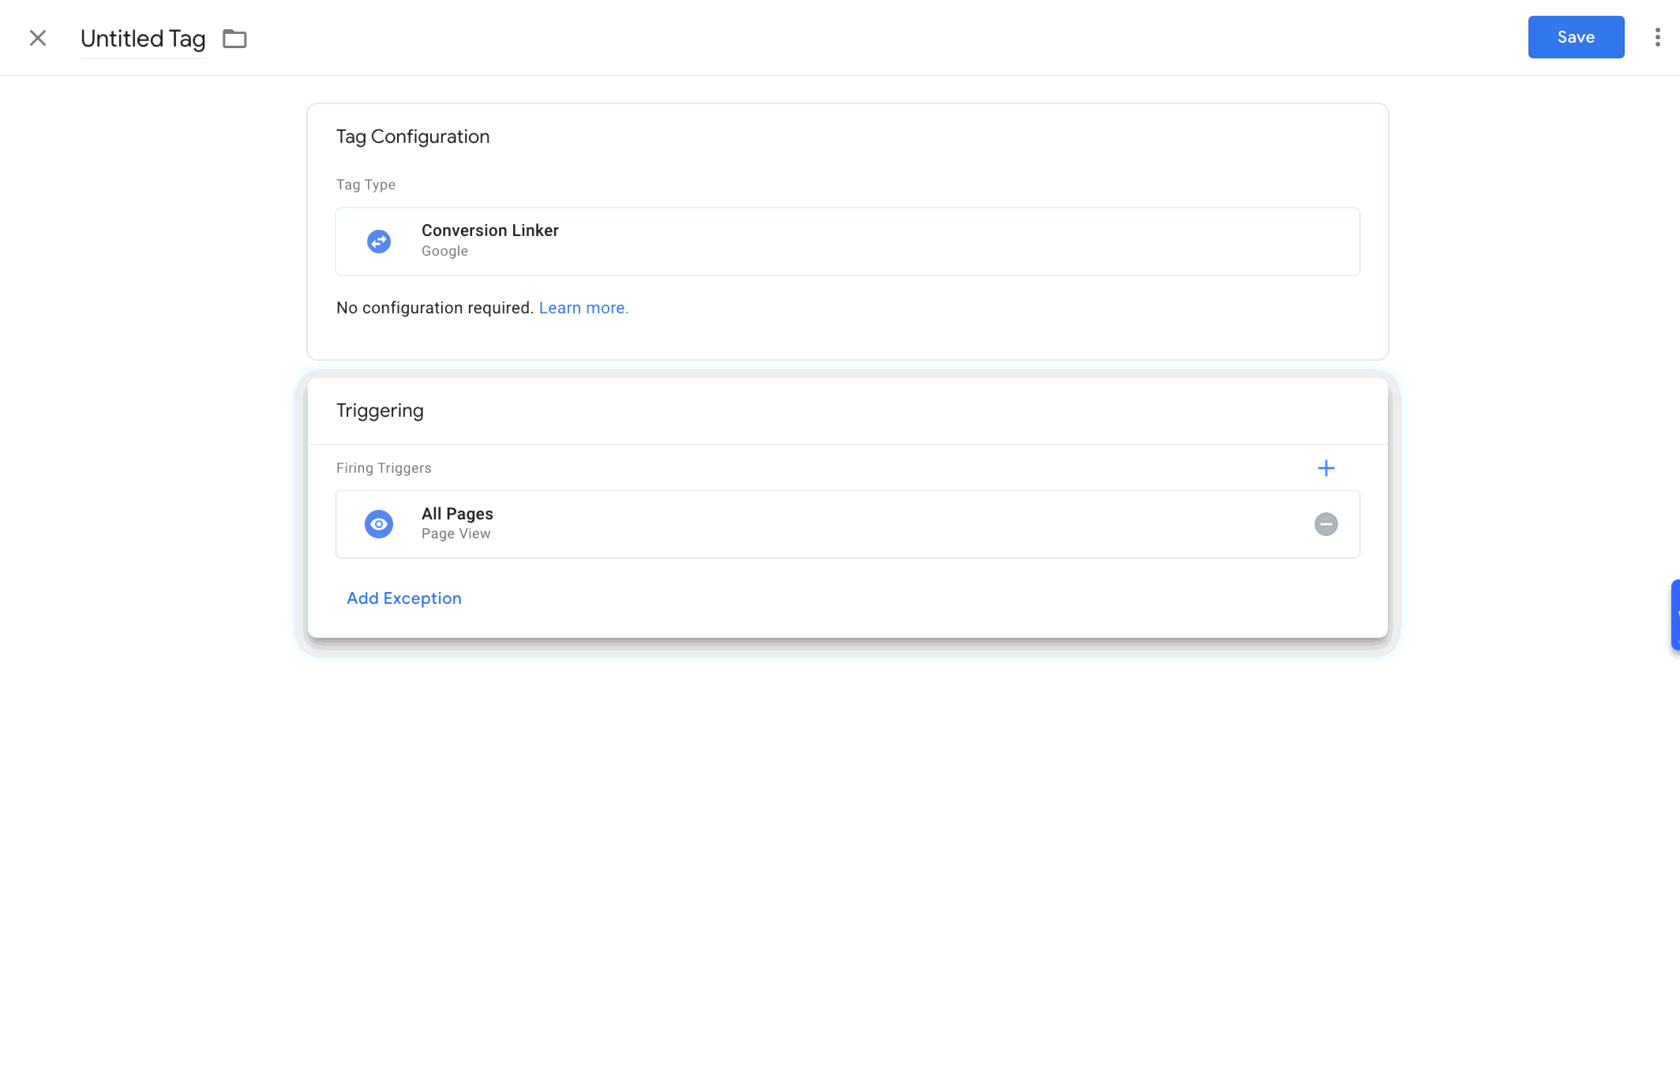
Measuring Google Ads conversions
- Open your Google Ads account and go to “Tools and settings” — “Conversions”.
- Create a new conversion and choose the type you need (for example, website — to record actions on your site).
- Choose a category and define a name for your conversion.
- Clicking “Create and continue” takes you to the tag setup.
- Here choose “Use Google Tag Manager” and copy the conversion ID and the label.
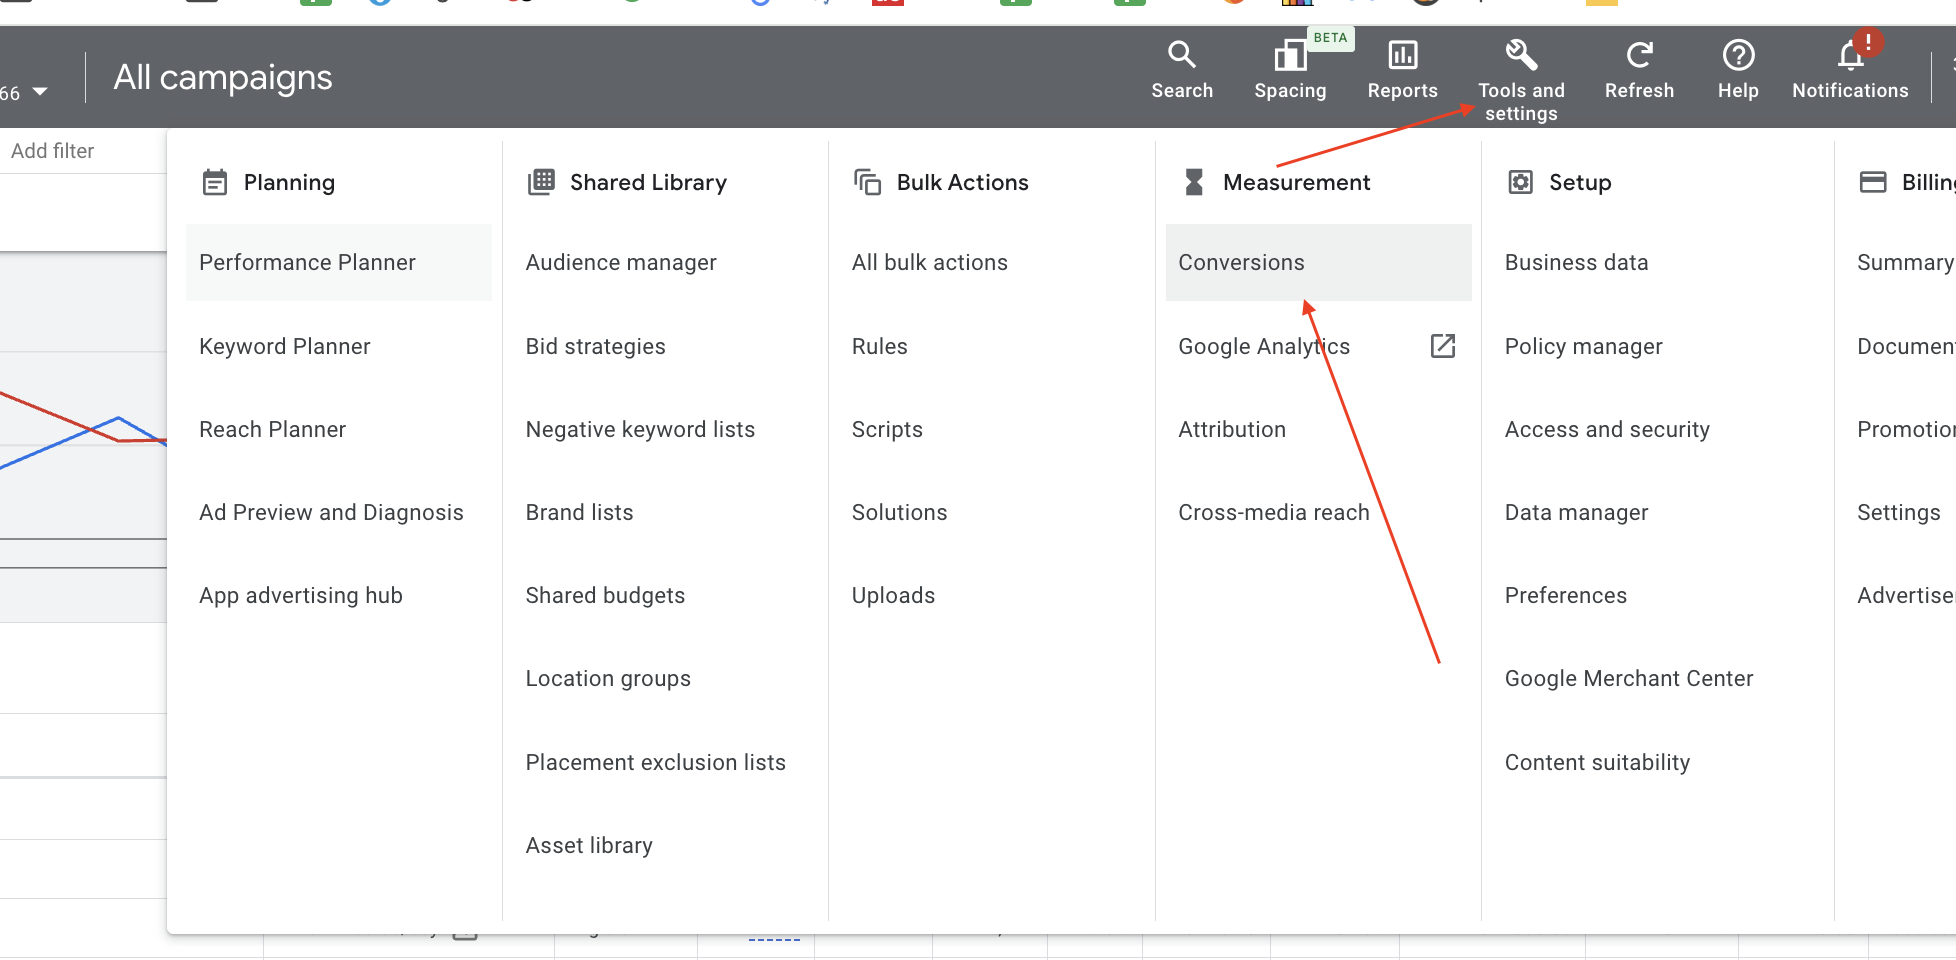
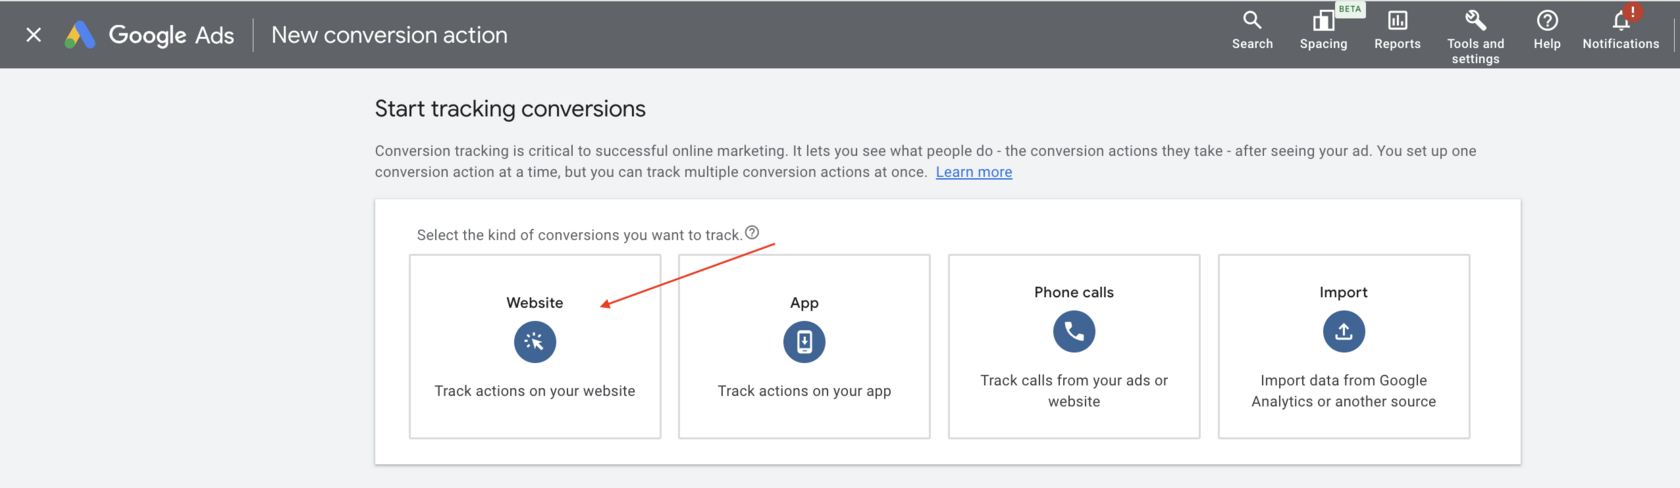
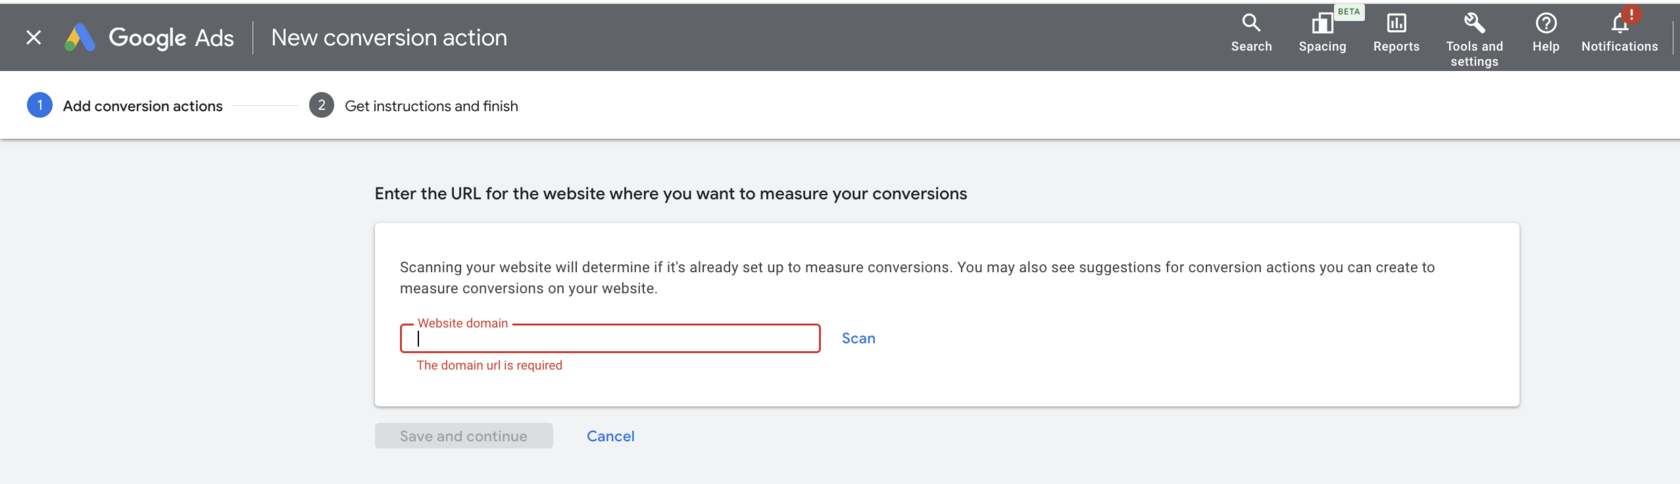
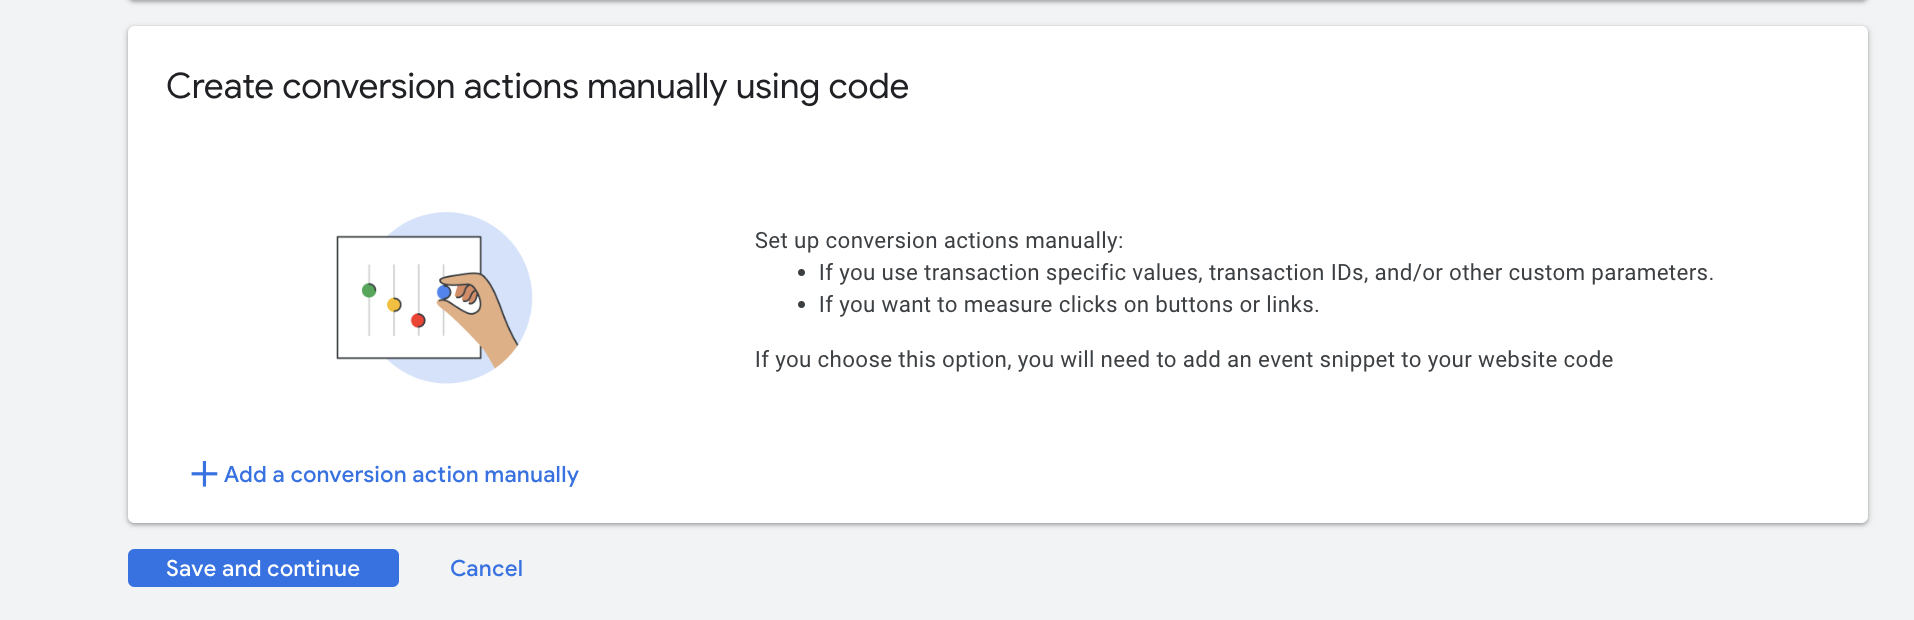
Create a new conversion manually.
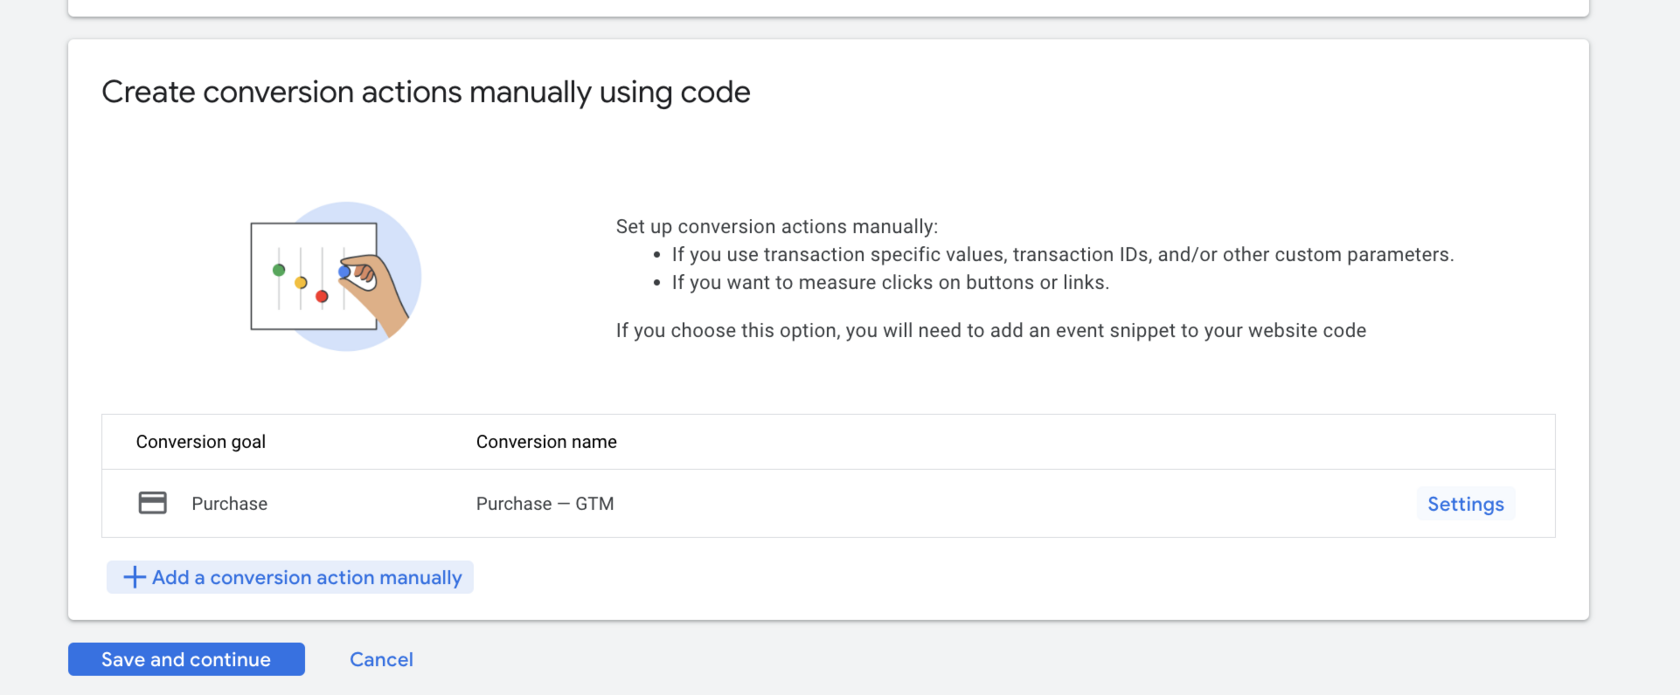
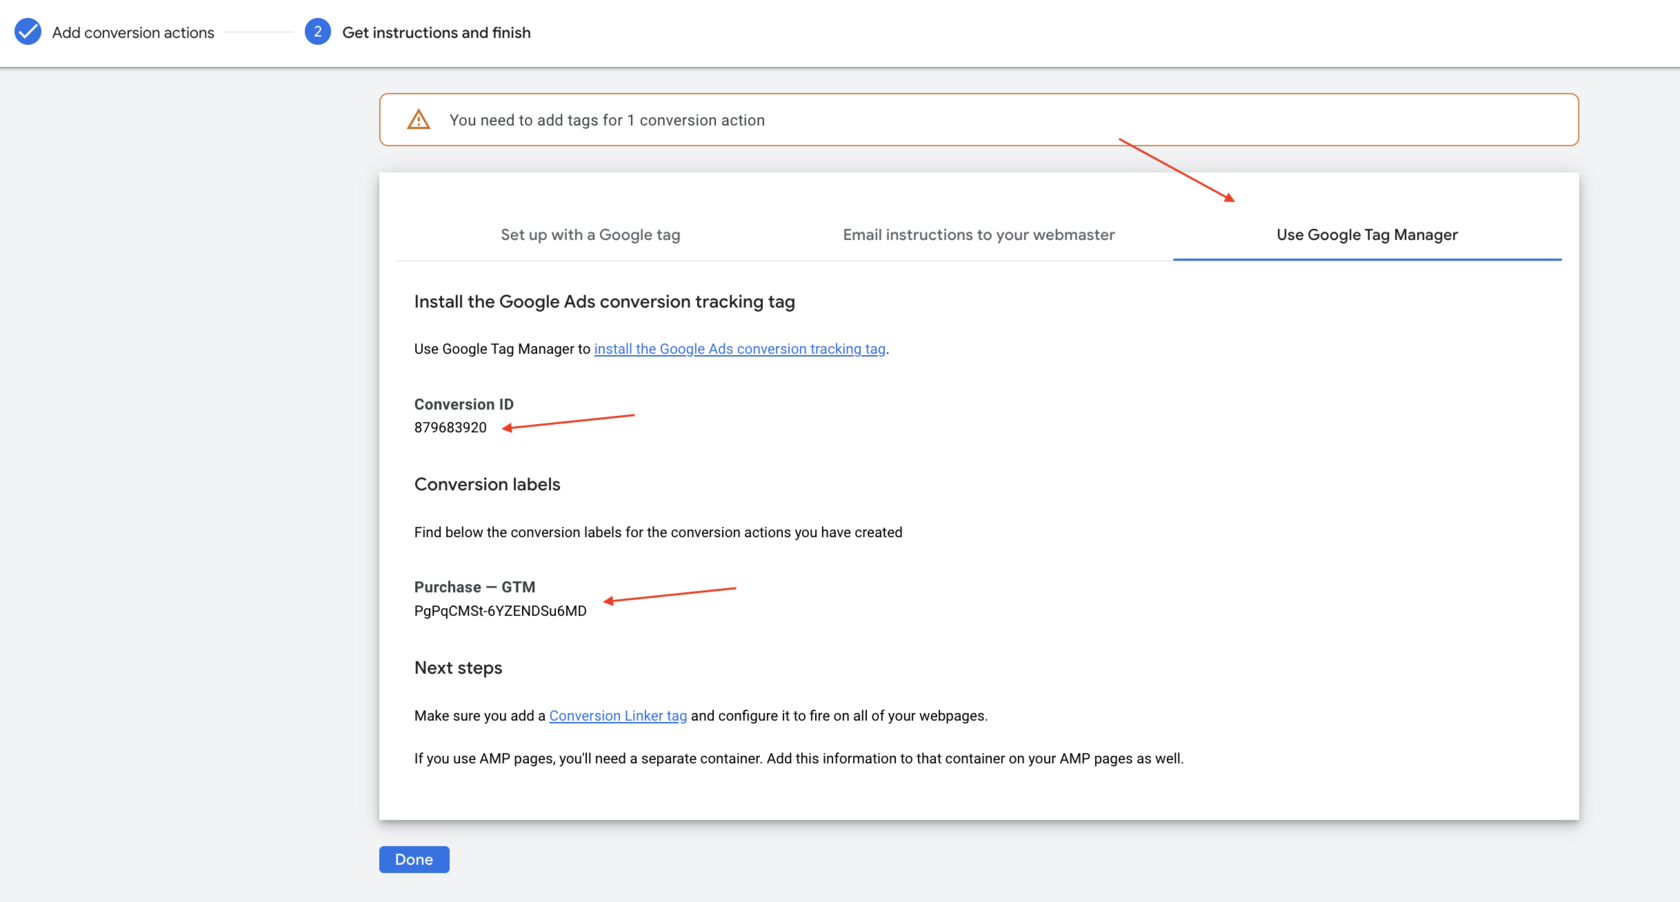
You need the Conversion ID and the Conversion Label to set up conversions in Google Ads.
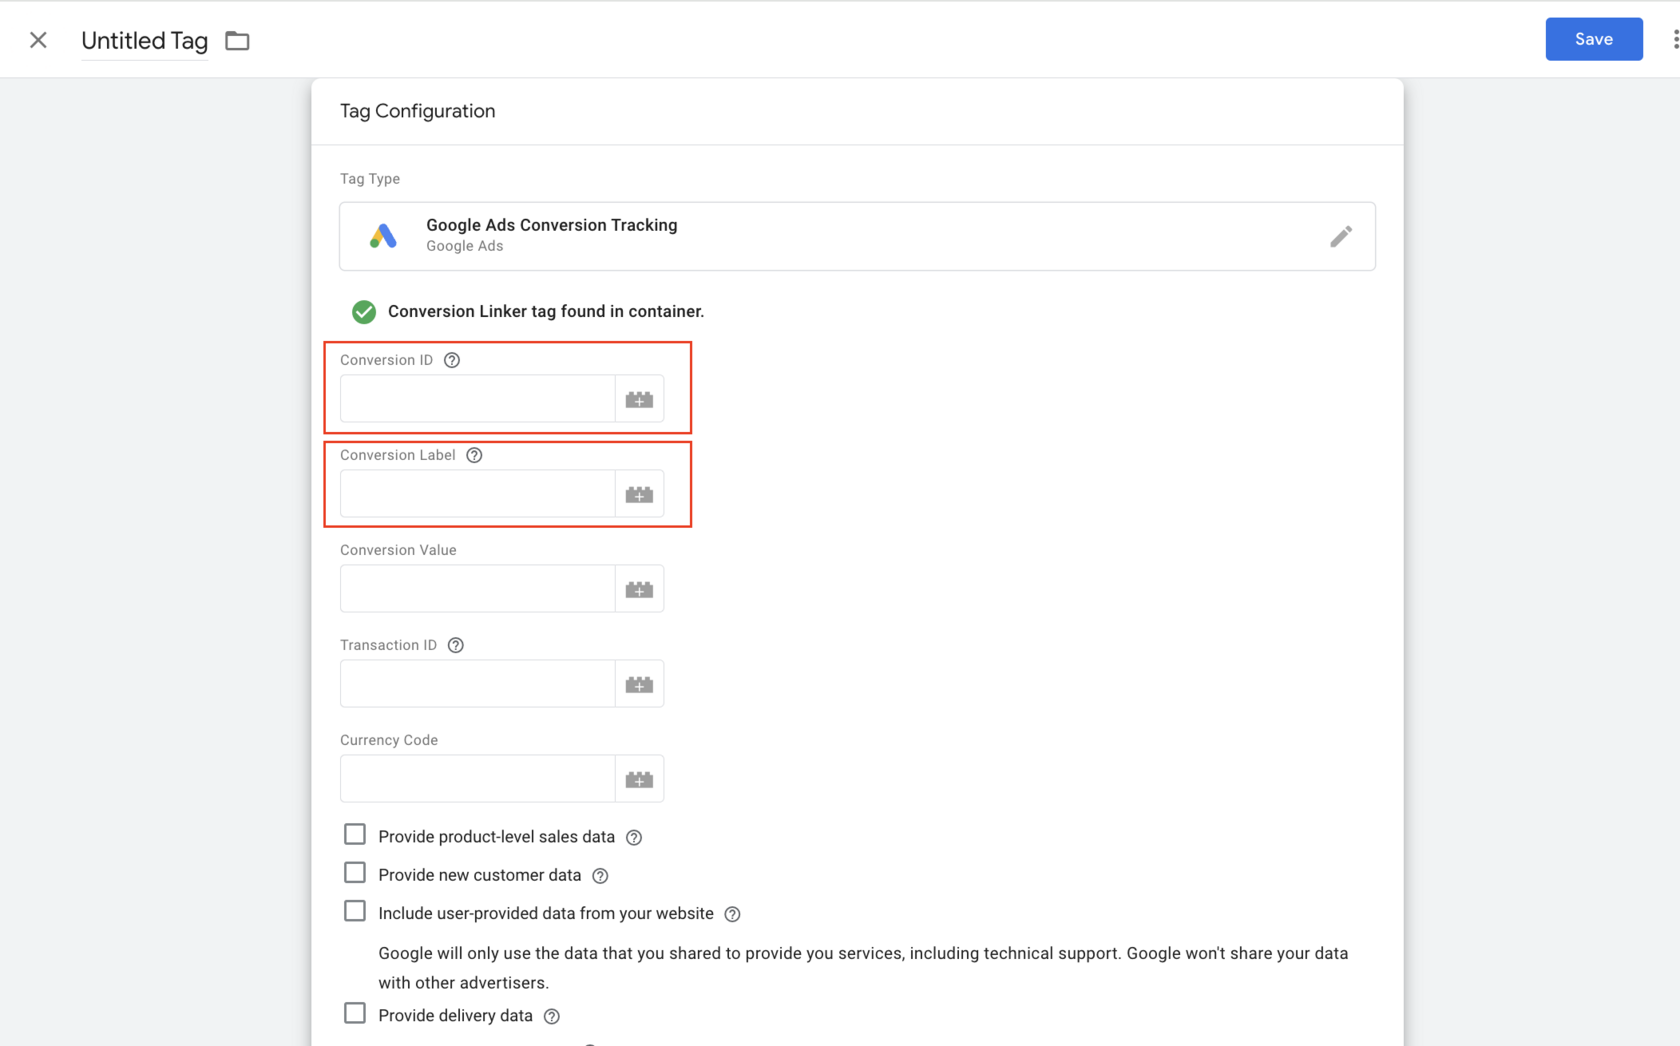
Switch to Google Tag Manager and create a tag of the “Google Ads Conversion Tracking” type. Enter the conversion ID and the label for the Google Ads conversion you have created.
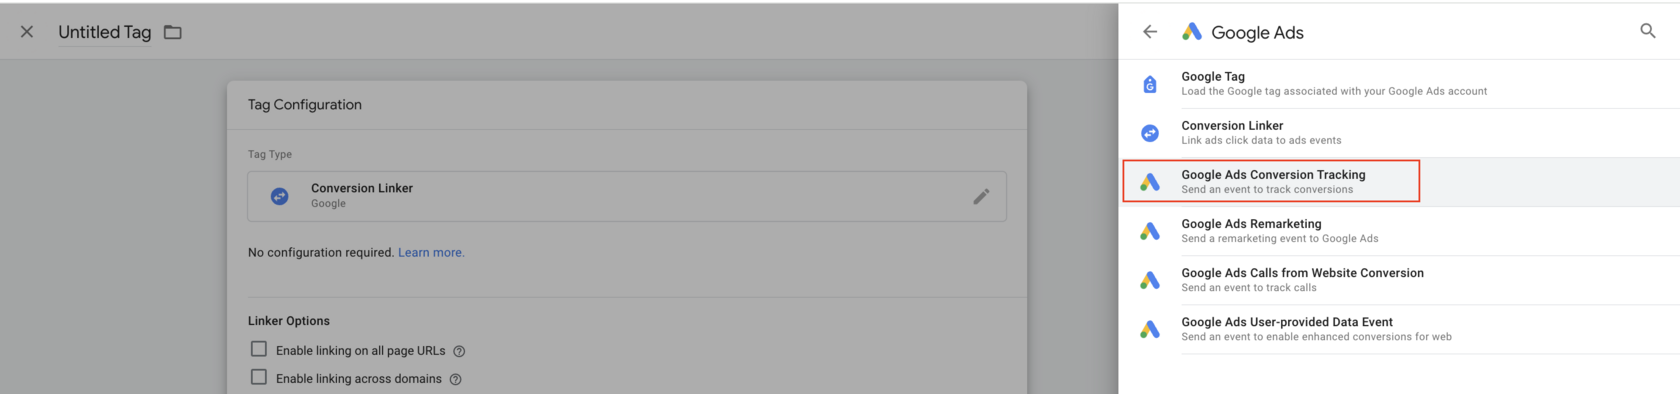
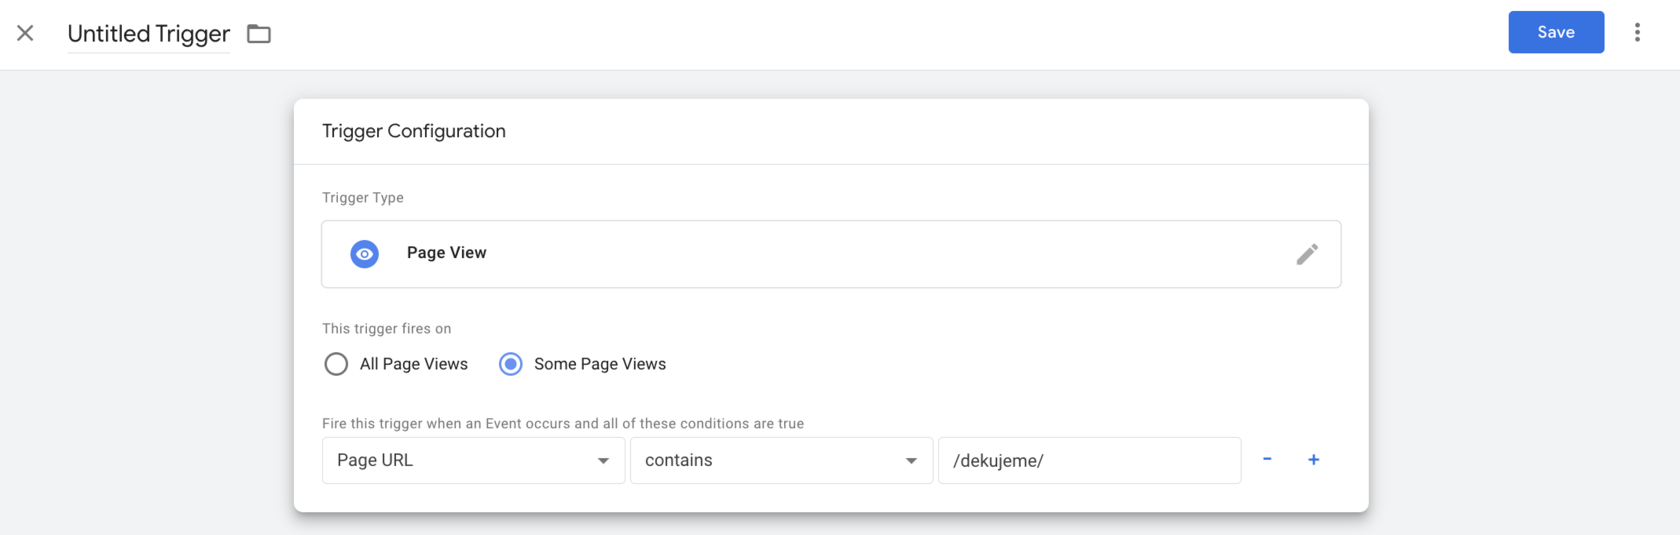
Create a suitable trigger or select an existing one to determine when the conversion should fire.
The most popular trigger for e-shops is a visit to the “Thank you” page.
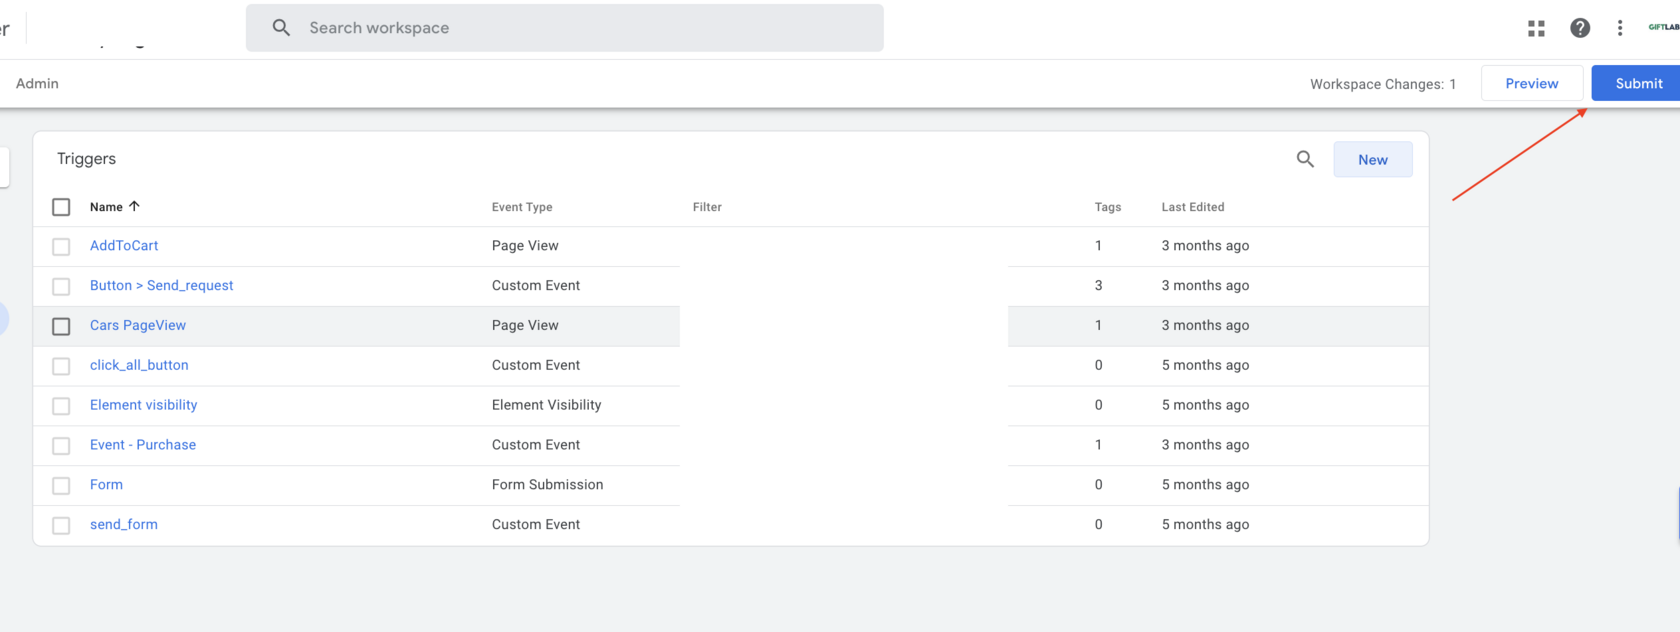
The last thing you need to do is save all the changes.
Ecommerce Attribution: Google Ads vs GA4 vs Your Shop
Find out which sales number to use for bidding, channel budgets and profit, and why Google Ads dates a sale by the click and your shop by the order.
Enhanced Conversions — a step-by-step setup for Google Ads and GA4
Form data is already collected on your site but never reaches Google Ads and GA4? Step by step — where to click, what you'll see, how to verify. Setup through Google Tag Manager.
Google Ads Conversion Tracking an Online Store Can Trust
Get purchase, revenue and ROAS numbers you can rely on: make the paid order your only primary conversion, sent with its real amount and a unique order ID.
Google Tag Gateway via Cloudflare — a detailed guide
How to switch Google Tag Gateway on via Cloudflare in 10–15 minutes and recover 11–25% of lost conversions in Google Ads and GA4. Step by step, in English.
Google Tag Gateway vs Server-Side Tagging: What Each Fixes
See what Google tag gateway and server-side tagging each recover for a store, which pays off at your size, and why a wrong purchase goal gets past both.
Enhanced Conversions for Leads — setting it up through Google Tag Manager
When the deal closes not on the site but in the CRM 2 weeks later, ordinary Enhanced Conversions doesn't help. A step-by-step EC for Leads setup through GTM with offline conversion import.